
Fill a scalar aux target#
The shipped builder no longer asks users to draw aux wires on a DAG canvas. Operation-valued parameters are side-loader targets. Selecting a target marks it green; clicking a compatible palette operation fills it.
This walkthrough uses FilamentousFungiDetector.inoculum_detector.
Step 1 - Add the consumer#
Open the Builder tab, then click GaussianBlur, ContrastStretching, and
FilamentousFungiDetector in the palette. The main chain is fixed and
left-to-right:
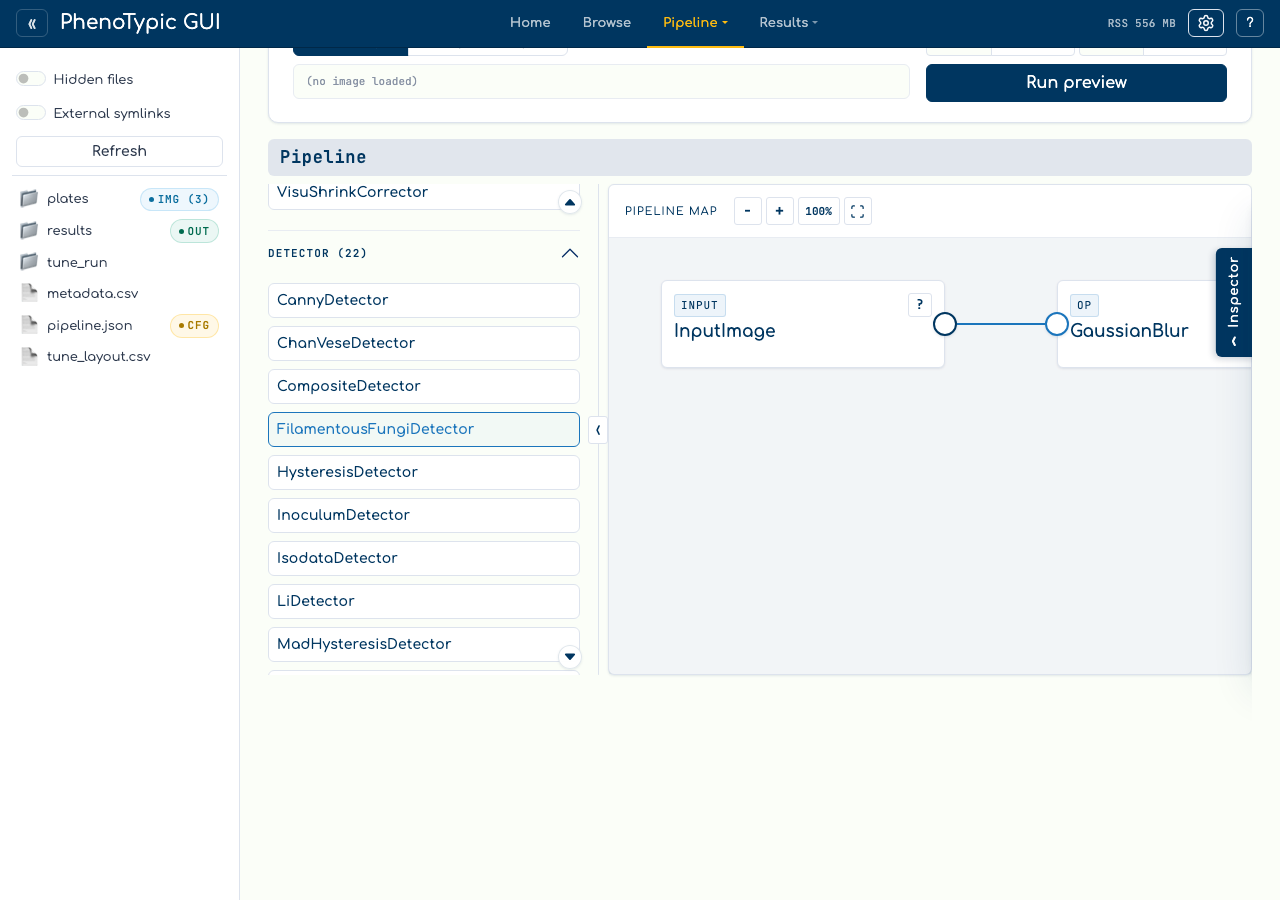
The side loader shows inoculum_detector as a required side value. Until that
value is filled, the issue badge remains active.
Step 2 - Select the side port#
Click the gold port button beside inoculum_detector in the side loader. The
port turns green and the active target strip names the parameter you are about
to fill:
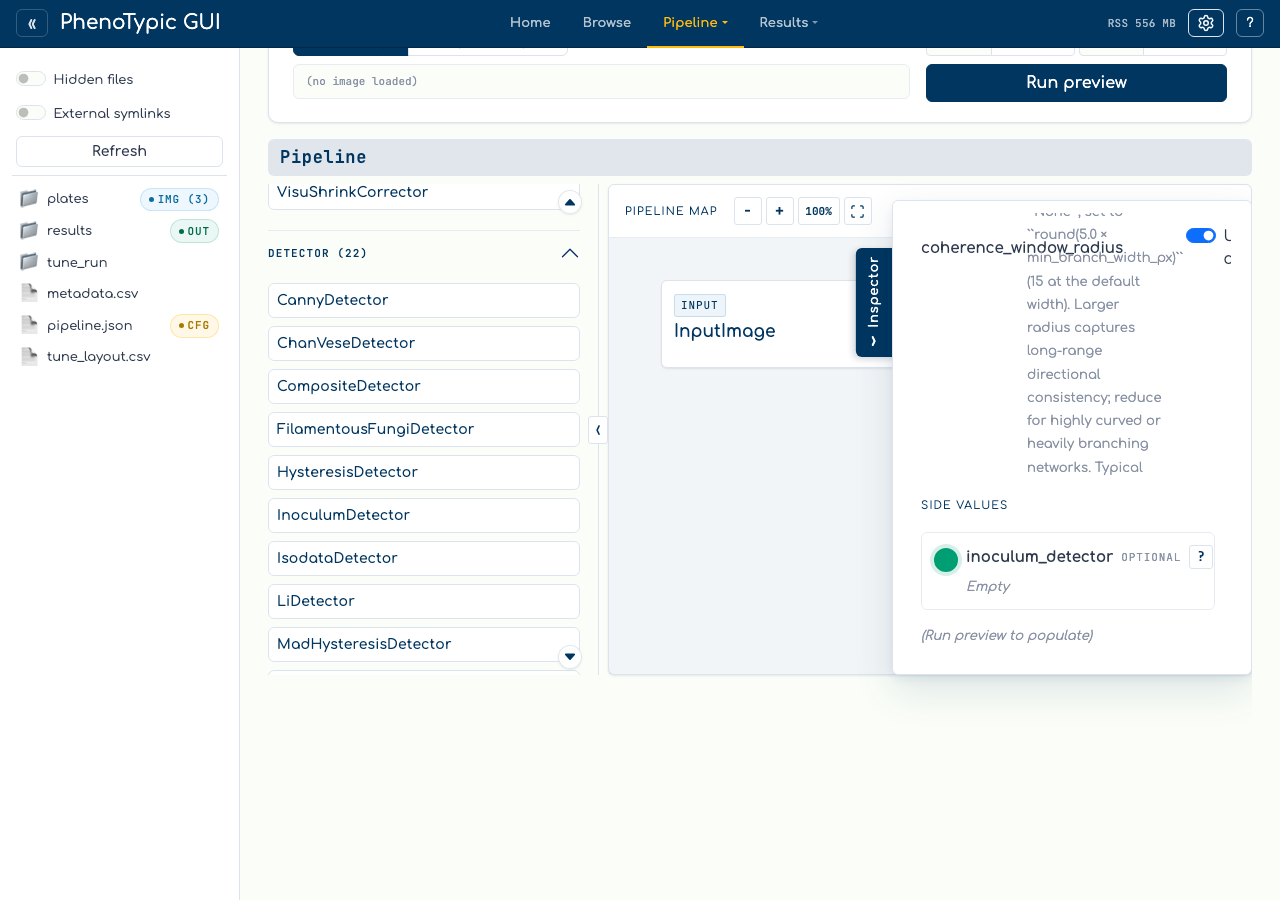
This is the same target-selection model used by the floating continuation port on the map. The next compatible palette click goes to the green target.
Step 3 - Choose the aux operation#
Click OtsuDetector in the palette:
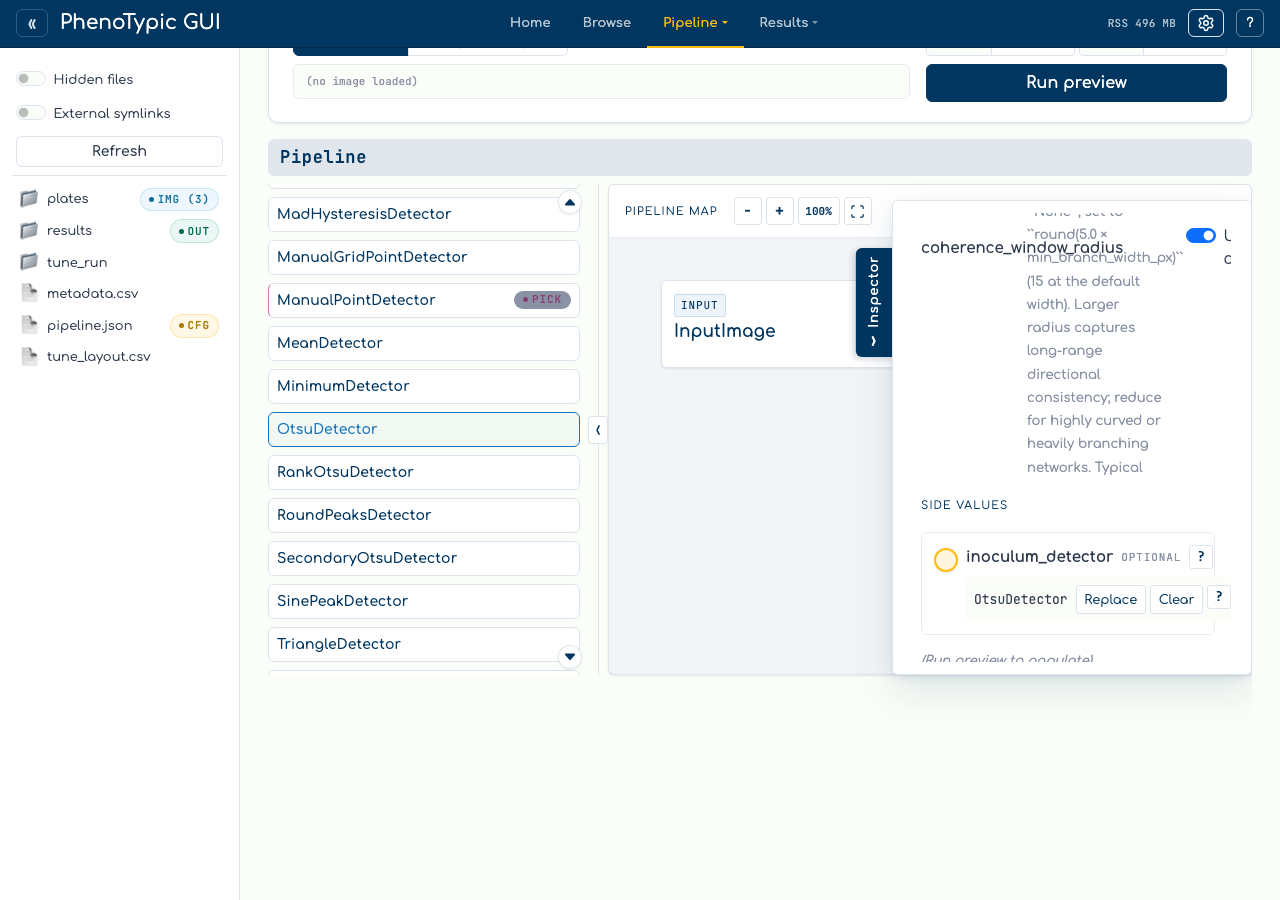
The builder creates a hidden aux source, records it in the DAG state, and keeps the visible map linear. The filled row can be replaced, cleared, or inspected from the side loader.
Reference#
No drag gesture - aux fill is click-only in the default builder.
Compatibility - incompatible palette choices leave the pipeline unchanged and show a warning.
Doc help - click
?beside the parameter or filled value to read the docstring.Preview - image-output and continuation port menus can preview a prefix; global preview/save still require the whole pipeline to validate.
Where to next#
Open an embedded Pipeline aux - use
+ New Pipelineas the side value.Fix validation issues - see how missing side values appear in the issue badge.
Build a Pipeline - the main image-flow basics.